the cyanotype extravaganza
Sometime, March, 2020 (Claremont CA)
For this project I’m going to try a new format, in which I document the steps I take as they come. I think it’ll be easier to track my progress, and this way I won’t accidentally omit steps/mistakes that I made.
Thursday March 19th, 2020. 5:13 AM
I’ve just finished watching NileRed’s 3 video series on YouTube that culminates in him making a UV reactive solution that can be used for cyanotyping, which you might remember as a kindergarten recess activity. They’re really great and informative, and you can watch them here. My main take-aways were that I needed distilled water, ferric ammonium citrate, and potassium ferricyanide. The brightside of having a Dad who loves chemistry, among other aspects, is that he was able to procure all of these items for me. If you don’t have immediate access to these chemicals, NileRed does a great job of explaining how you can synthesize them yourself. Or, the final version of the solution needed for this project is available online.
A Cyanotype speed lesson
While I don’t normally condone the use of Wikipedia as the end-all-be-all source of information, I do think it’s a great jumping-off point for any research you may be doing. For our purposes, we only need a quick overview, so the following as been paraphrased by me from the Cyanotype Wikipedia page, which can be found here.
The easiest way to think of a cyanotype is as a printing process that uses the sun to develop its ink, which is limited to shades of white and blue. The relative amount of sun that reaches the paper determines the depth of the blue color, thus producing a print. When you picture classic blue prints for buildings, you are picturing a classic applied use of cyanotypes; architects would send their designs to a printing company which would produce a transparency, and then develop the image on paper using this UV-only-in-blue process. Thus, producing the concept of a blue print that you now know today. This was all forgotten as common printers became mainstream, but I think it’s still a fun exercise in the way things used to be done.
In terms of the chemistry behind this process, it can be boiled down to a couple essential components: ferric ammonium citrate, potassium ferricyanide, distilled water, and UV light. Both of the former compounds are dissolved in water. This mixture can then be applied to any medium that will soak it up (cloth, paper, etc). Once the mixture has been applied to a surface and allowed to dry, a transparent negative of the image to be reproduced is laid over it and set in the sun. Developing times range from anywhere from 1 to 15 minutes depending on the conditions. Then, the final image is developed in water and can be set by being left out or rinsed in hydrogen peroxide. This finalizes the formation of Prussian Blue, the compound which is formed when the mixture is exposed to sunlight, giving it its trademark blue color.
initial efforts
My Dad was able to procure compounds similar to what I needed, and I unknowingly used the one less akin to the compound I wanted first, which resulted in lackluster results. While in some places I was able to get small patches of Prussian Blue, the overall result was a grayish blue that developed from a deep yellowy green, which was not what I wanted. While some faint traces were visible(such as in the case of my 30 minute test), it was not the deep blue nor start contrast I wanted. There were a couple things I wanted to fix for next time.
One. I needed a more exact way of measuring substances. For this I had my Dad bring home a balance from his lab so I could use that instead of the cooking one we had.
Two. I needed to use compounds more like what I was supposed to be using. My Dad got me <insert>, so now the only factor I was missing was the citrate. In a pinch, I made plans to squeeze a little bit of lemon juice into the solution.
Three. I needed hydrogen peroxide to further develop my images.
With this information, I proceeded onwards in my attempt to create cyanotypes. I was briefly halted by the Spring clouds, so the next updates come from a couple days later.
lab procedure
Materials
scale
2 small beakers or mixing containers
stirring stick
2 grams ferric ammonium citrate
1.4 grams potassium ferricyanide
0.8 grams citric acid
20 ml distilled water
paper or medium to brush mixture onto
brush
large shallow dish
water
hydrogen peroxide
transparencies and or plastic bags and a sharpie
optional: 2 glass plates
Note: this process is sensitive to UV light and should be done outside the reaches of sunlight.
Steps
Combining Ferric Ammonium Citrate and Water
Arguably, the names of the compounds make this process sound a lot more intense than it is. Basically, combine your 2 grams of ferric ammonium citrate with 10 ml distilled water in one of your small beakers or mixing containers. From there, swish and stir it until it is fully dissolved.
Combining Potassium Ferricyanide and Water
Repeat Step 1, but this time substitute the 2 grams of ferric ammonium citrate with 1.4 grams of potassium ferricyanide.
Combine Both Mixtures
Now, dump one mixture into the other and stir to combine. Your should now have a solution that consists of 2 grams of ferric ammonium citrate, 1.4 grams of potassium ferricyanide, and 20 ml of distilled water. At your leisure, dump in the citric acid.
Making Medium
Taking your brush, apply a thin and even layer of this mixture to your medium. Then, set it aside somewhere dark for 1-2 hours to allow it to dry.
Making a Transparency
If you’re using a plastic bag, cut it up so you have a single sheet of plastic. You could also use cling film. From there, draw your design on the plastic with a sharpie.
If you’re using a transparency, Using Word or Google Docs or Photoshop, upload your image and convert it to grayscale and then invert the colors. Use a printer to print the resulting image onto your transparency.
Developing an Image
Indoors, assemble your items in the following order: (on the bottom) optional glass plate, medium with applied and dried mixture, transparency, optional glass plate (on the top). If you do not have glass plates or picture frames to get them from, put the medium with the transparency over it on something like a plate or cutting board and anchor the corners with small weights or tape to hold it in place.
Outdoors, set the whole setup in direct sunlight. The developing process can take anywhere from 1-15 minutes depending on the level of sunlight, so you will have to try our some different times to make it work. Once the time is up, bring your print back inside.
Finishing an Image
Now inside, take a shallow bath of tap water and submerge your image. Swish it around until the blue color is fully developed. Remove from the water bath, and allow to dry completely.
Optional: after removing from the water bath, immerse in a separate hydrogen peroxide bath to further develop and fully set the color. Then allow to dry completely. This results in a deeper Prussian blue color.
execution
Follow the lab procedure above ;).
final results
This project followed the unfortunate path of many of mine: I did a lot of different things and got a picture of maybe 1% of them. I made prints mostly of personal photos, some of blueprints I found online, and even some designs on fabric brushed with the mixture. Below is a blueprint I made of a schematic for an XB-70:
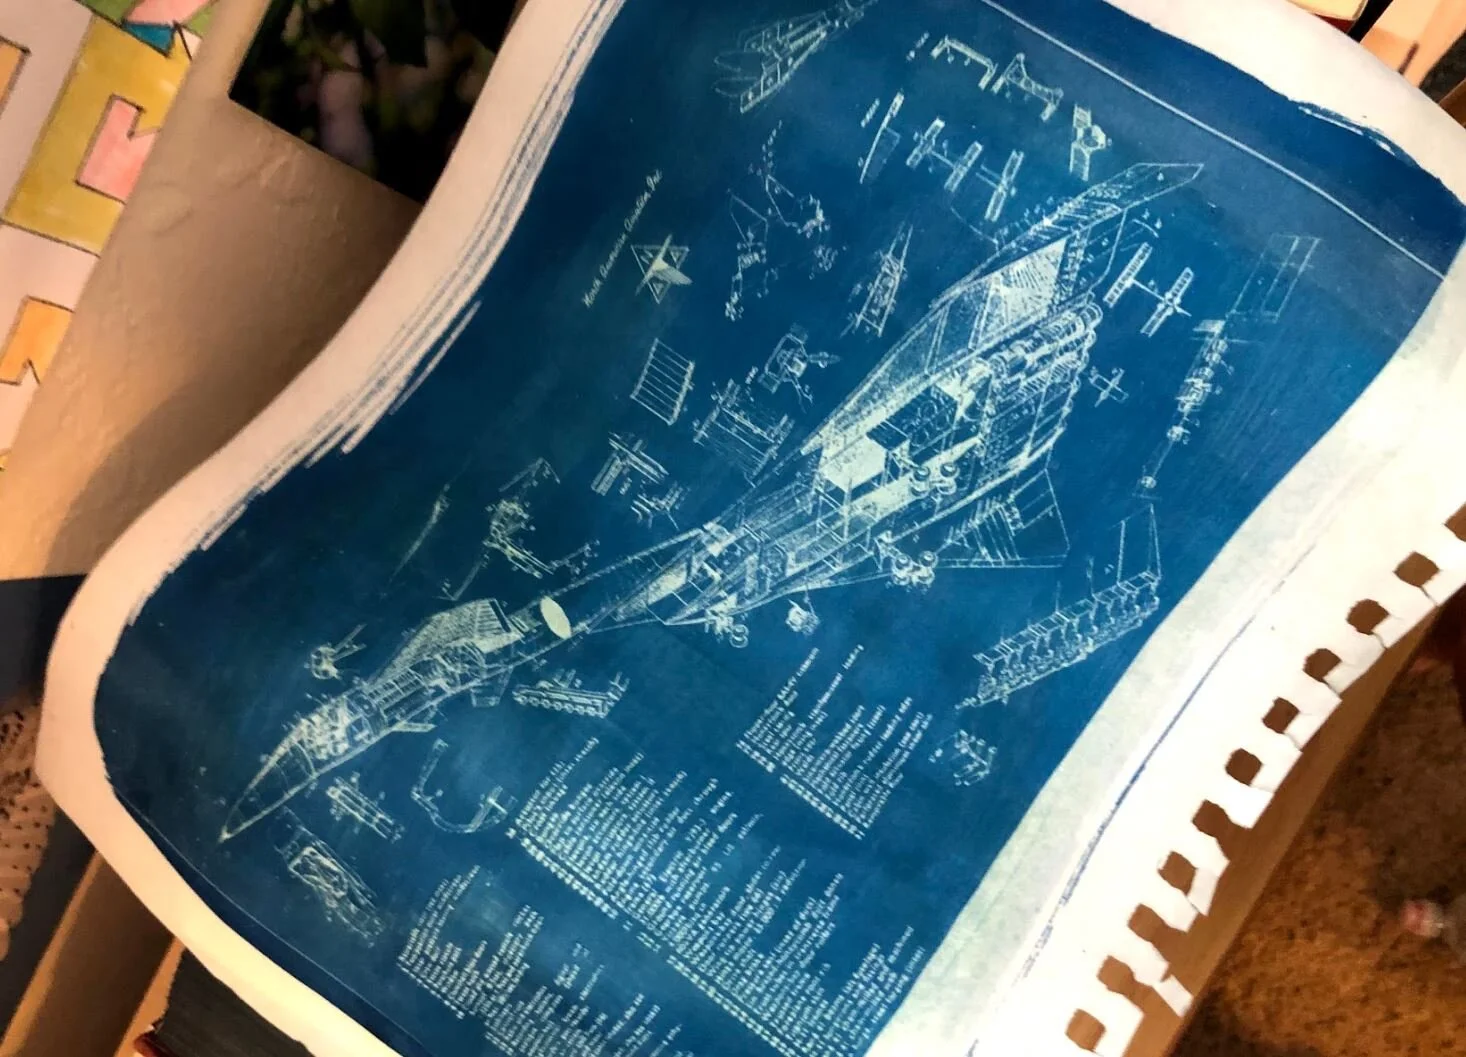
xB-70
Unfortunately the only photo I have :’)